Wednesday, March 14, 2012

Sending the Scary Closet Back to the Realm From Which It Came

This is an update on a post from earlier this year. I tackled a much-needed closet makeover, using inspiration from here and here on Pinterest. It's one of my favorite recent before-and-after projects. So I decided to share it with everyone for the unofficial Pinterest Challenge, which is the brain child of Sherry and Katie to get people to "stop pinning and start doing."


The day we moved into The Capers, aka our house, back in 2009, I tossed a bunch of boxes containing paint supplies and crafting items into the closet in the front room. Chris took one look at the eerie pink paint with grey scratches all over the walls and never looked back. He said it reminded him of a closet out of a horror movie. Poltergeist, maybe? It did have this creepy feeling of being a portal to another dimension.

Anyway, as of about two weeks ago, those same boxes were still living in the scary pink closet, being of absolutely no use to anyone. Also, my beautiful new bookshelves were getting loaded up with so many items that they were starting to look cluttered and overwhelming. It was time for a utilitarian overhaul. It was time for me to send that closet back to hell and create a new, friendlier, more organized closet.

The first step was clearing out the mess.


Check out the cracked paint on the door, which was probably white at some point but now looked greyish yellow.


Gotta love the random hole in the wall where you can see right through to the original wood lath. Awesomesauce.


And let's not forget how fantastic the gross pink paint looked against my freshly painted Golden Pyramid walls.


See the claw marks on the ceiling? (OK, OK so it's probably just scuffs from the hangers, but it still looks creepy).

One day on a whim, I picked up a paintbrush, grabbed a bucket of paint that I had bought for the hallway (Benjamin Moore's Moonshine) and painted over the pink monstrosity. Already a big improvement. Sometime over the next few days, I went to Lowes and bought a wall patch for a few bucks and got to work repairing the hole in the wall.


Another coat of paint, some glossy white paint on the trim and the door and we were in business. The closet was looking much better. But I knew I'd have to be smart about how I organized the closet if I was going to use it to store all of the not-so-pretty but oh-so-useful supplies from craft projects and home repairs. Enter a Macy's gift card that was a gift from Chris's aunt Lynn. I snagged an over-the-door accessory organizer and 2 cloth hanging shelves for a steal during a particularly good home sale.

So here it is all organized and painted and looking like a type-A dream.


As you can see, I haven't finished my big organizational coup, but we're off to a good start. The hanging shelves offer a lot of space for keeping frequently used items handy and easily accessible, but I'll still be able to close the door and hide the visual clutter.

Having our little filing cabinet upstairs is also nice so we don't have to trek down to the basement every time we need to file away a receipt or owner's manual.


I started adding a little gift-wrap center on the back of the door. I had to hang that wire shelf (which was already in the house in a different room, so it was totally free) super low because the screws were too long for the recessed center panel in the door. I found that out the hard way when I pushed the screw right through the door. You can even see the hole on the right side there next to the wrapping paper. Oops.

I'm also going to add a 3M hook to the top so I can hang gift bags. Not sure what's going to be stored on that bottom shelf yet.


Here's the over-the door accessory organizer up close. The clear pockets make it great for storing tools and keeping everything in sight. We'd been storing the tools in one of the baskets on the new bookshelves, but the space was limited and it was tough digging around to find the right tool. This system is way more convenient. All I did to adapt this over-the-door design for use on the wall was take out the metal hangers and nail right through the reinforced sections of the fabric into studs behind the wall. Super simple.


And the cloth shelves just hang on the existing bar that was already installed in the closet, but not being used for anything. It worked out well that the bar was installed way at the top of the closet. While it caused the previous owners to make scary scratch marks all over the ceiling, it enables the shelves to hang nice and high and leave plenty of room for our filing cabinet, canvases and other floor-dwelling items.


Update: Here's a few pictures of the closet several months later, still being a organization power house and holding lots more tools, gift supplies, leftover wedding goodies, and more.


So whadya think of my little transformation? I know it's just a closet, but eliminating one more messy zone in the house feels good. I love organization, even if I'm not always the most organized person. With this project well on its way, the last big organizational overhaul I have on my list is the basement, the mother of all disaster zones. But this little closet is definitely motivating me to keep going. :-)
Pin It

Tuesday, March 13, 2012

Jamming with the Monsters

Last weekend, Chris and I joined 34,000 other people at Monster Jam at the Syracuse Carrier Dome. It was actually pretty cool. We got to see lots of big trucks crash and fly through the air.

Below, you can see some of the track for the races. A race basically just consisted of 2 trucks driving around the track twice, starting at opposite sides.


So in each race, each truck would go over each ramp twice and go flying through the air.


They had a ton of trucks lined up and ready to go. This was about half of them.


After the mosnter truck races, they had some ATV races with a really corny staged fight between the opposing teams.


Then the motocross bikes came out and did some stunts off a really steep ramp. If you look closely in the picture below, you can see a guy flying through the air, about 25' above the blue and orange cushion. And yeah, he's stretched out like Superman with the bike below him and his feet way up in the air.


Next came the freestyle Monster truck competition. This was definitely the best part ... mainly because the trucks crashed and rolled over and they destroyed the other cars.


About halfway through, they even towed in and old trailed and the trucks absolutely obliterated it. You can see the remains of it in the picture below, as well as the remains of Grave Digger. During it's freestyle run, the body started peeling back and flapping in the wind, but the driver kust kept going. The whole thing tore apart, but he didn't stop until the truck was totally dead. Pretty awesome.


Pin It

Friday, March 9, 2012

Treating Myself to a Little Spring Break

For my birthday this year, I decided to treat myself to Spring Break. Woohoo! I decided to do some ecotourism, bask in warm weather, encounter some wildlife, commune with nature ... well you get the idea. Jealous?

Sounds good, right? Oh wait, I forgot to mention that my Spring Break lasted one hour, was in my backyard, I made a compost bin, the nature was a pile of leaves, and the wildlife was Mr. Meowface.

Stay in school kids. Stay in school forever and ever and ever and ever ...

So yes, I left work an hour early on my birthday (I get to make up the hour by skipping my lunch break for two days) and I went home and did yard work. Chris changed out the snow tires on his car and checked a weird noise he heard coming from the back end when he was driving home. Living large, ladies and gents. Living large.

Do I sound bitter? Ok, so actually, I was really excited to make the compost bin. I always hate throwing out the coffee grounds and egg shells and things when I know I could use them to make my garden more vibrant and healthy. It's a waste! So I finally shelled out the big bucks to purchase this $4 bin at Wegmans.

Ok, yeah, we forgot to rake up the leaves last fall. We were a little busy getting married. haha But keep scrolling down to see how I spent the rest of my fabulous hour of freedom.

So don't take my word as gospel. This is my first compost bin. But I did a little research and this is what I came up with. First, I started with a layer of dirt in the bottom. Then I added a layer of dead leaves. That's it. Done.

Oh, and I also drilled a few holes in the top so it doesn't get moldy I guess. I don't really know why, but I know you're supposed to let the air get to the composting materials.

Update: Turns out holes in the top let in air AND rain. Who woulda thunk it? After finding my bin full of water and my compostables floating around in muddy muck much, I decided to duct tape the holes closed and drill new holes on the sides of the bin just under the lip. So far, it's working out much better.


But now it's all ready for coffee grounds (yes coffee filters can be composted as well), egg shells, fruit and veggie waste and even some dryer lint. Apparently you just have to give it a good stir every once in a while and let it sit and decompose. And then eventually, you can use it to ammend the soil in your garden. How easy is that?

So with the leftover time, Meowface and I decided to get a start on the leftover leaves covering the corners of the yard.

 
Much better than the first picture, right? If you zoom in on the picture below, you can see the little beginnings of my hyacinths sprouting up. Yay spring (almost)!


Oreo decided to celebrate by rubbing all over everything.


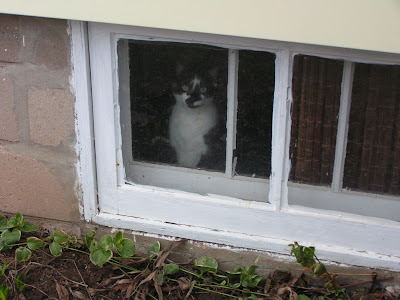
Zoro watched the action from inside the house. First he sat in the kitchen window above us, but then he decided he needed to get a little closer to the action, so he found the corresponding window in the basement so he could tap on the glass to get our attention.


Aww, poor little Zoro. Maybe if we ever fully fence in the yard, I'll be able to let him out with me and Oreo. But for now, he's just too skiddish to come out and play. Luckily he seemed to have fun and get lots of exercise running from window to window as we walked around the house. haha And I promise he got a nice long belly rub when I got inside and he was purring like the kitten he is. :-)

It's My Birthday and I'll Eat Pie If I Want To

I got a few more birthday pictures to share. Chris and I got out of work a little early on my birthday and had some fun outside in the 60-degree weather (more on that in the next post) and then grilled burgers and corn on the cob for dinner. Afterward, Chris presented me with this lovely birthday cherry pie (that he went to 2 different stores to track down for me.)


And here is the cutest birthday card in the world, made by my neice, Hadley and her mama. I love it so much I might even have to frame it.


And here's part of the gifts from my parents. Sooo excited to get these adorable little turquoise birds out in my garden. Chris is more excited for me to cook some food out of the Perfect Italian cookbook. haha


Chris, my wonderful husband got us tickets to the Lewis Black show at Turning Stone in April as a delayed birthday present. haha I am sooo excited about that. Lewis Black is unbelievably funny and it's going to be awesome.
Pin It

Wednesday, March 7, 2012

A Happy 26th Birthday

That's right. Today I celebrate the big 2-6. Ok, so really, it's not a very big event. Anything after 22 doesn't seem all that eventful anymore. And now I'm in my late 20s, which is not super thrilling either. Luckily though, I've got some wonderful people in my life that are managing to make this a special day for me nonetheless.

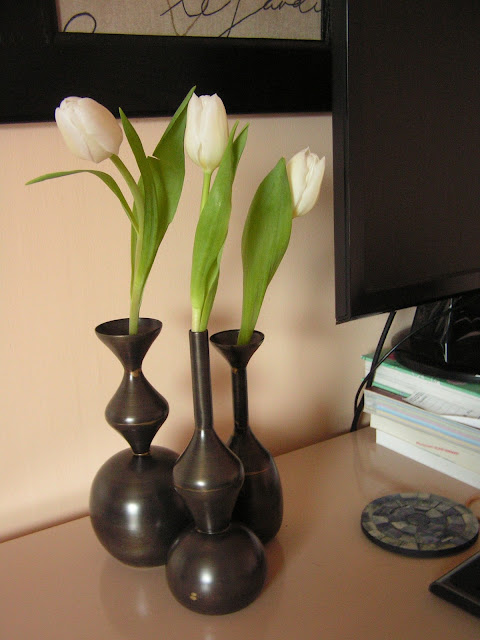
My wonderful brother and sister-in-law sent me a package from one of my favorite stores, CB2.com. One of my favorite presents is this set of handmade iron vases. Pretty awesome. They look goregous on my desk, but I might try them out in a few places to see where they look best.


And the tulips are a little gift I gave to myself. haha Gotta love $6 flowers at Wegmans. I have the rest of the tulips making my wall look lovely with my man and woman vases, which coincidentally, are also from CB2.


My mom sent me a set of goregous little dessert plates with a sweet African animal theme. I'm thinking about hanging them in my half bath once I get it painted. Because who wouldn't want plates in their bathroom? It's a design statement, I tell you. But I forgot to photograph those. And also, I meant to take a picture of the cutest card in the world, made by my darling neice, Hadley (with some help from her mama, I'm sure). So I'll try to snap a few more pictures at some point today or tomorrow.
Pin It

Saturday, March 3, 2012

Terrariums on the Brain

It's time to confess: I am completely hooked on terrariums. It all started when Chris got me this awesome terrarium kit for Christmas. It came with everything I needed to build this awesome little guy:

I've been keeping the terrarium on my desk at work and it really perks up the office. It's nice to have a little bit of nature around, especially in winter.

I recently bought this button fern and he's been living it up in the humidity in our bathroom. In fact, the fern was doing so well, I decided to try using it to make more terrariums. I've never had much luck with stem cuttings, but I've also never tried rooting hormone, so I figured I would give it a chance.

I found a few more pretty glass containers and then just filled them with similar materials to what was in the kit. I started with a layer of perlite to help with drainage, and then I added a layer of activated carbon. The kit used activated charcoal, but I couldn't find that anywhere. The manager at the pet store assured me this would work just as well. All it really does is help keep odors down. After that, I added a layer of coarse sand, again to help with drainage. You can see that in the picture below.


After that, I added my potting mix and planted my plants. I bought a couple small plants that require lots of water and not much sun and divided them up between the new terrarium bowls. Then I cut some hardy pieces of the button fern and the plants from my existing terrarium and dipped them into the rooting powder before planting them in the new terrariums. I did this just accoring to the directions on the rooting hormone bottle.


You can see the assortment of different plants I included in the big terrarium. I also stole a little moss from the first terrarium, but I'm hoping to go out and buy some more at some point. I'd also like to add some more rocks and maybe a miniature figurine for a little bit of whimsy in a glass. haha


You can see the layers of perlite, carbon, coarse sand and potting mix really well in this picture. This new terrarium also needs some moss, but the lid on it will really help to retain the moisture. I also didn't screw the lid on all the way, so that way air can still get in. If the plants doesn't do well, I may have to adjust it somehow.


While I was playing in the dirt, I decided to enhance my succulent collection as well. I found a few hens and chicks in my garden outside and transplanted them, along with some cuttings of other succulents and some aloe vera into this pretty vase.  Then I covered the layers with another layer of coarse sand for a pretty look.

Isn't this a gorgeous container? I got it at HomeGoods and am thrilled to have more kitty-proof plants in the house. There are only select plants I can keep because the cats won't bother them (like the Hawaiian guy to the right in the picture below), so it's nice being able to put whatever I want in a container. Now I just have to make sure it's in a safe place where the kitties won't nudge it off an edge.


Here's another of the mini terrariums I made. The glass is hard to see through in this picture because I just sprayed it with water.


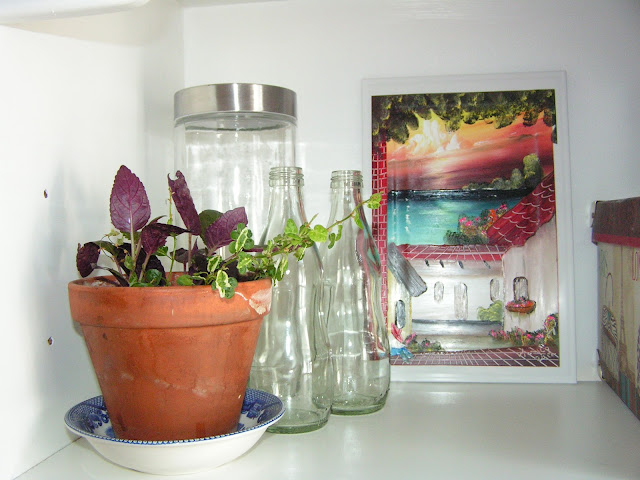
Here's the leftovers of the plants I divided for the terrariums. Also, that painting on the right is a souvenir from our honeymoon. A local artist painted it for us while we ate dinner one night. He used his fingers to paint the whole thing!


I'll be sure to post an update with how the plants are doing in a couple weeks. Hopefully the rooting hormone works and I remember to keep the soil moist. The good thing is that I used some of the divided plants in every terrarium, so even if the stem cuttings don't work out, the plants with roots shouldn't have a problem getting settled in their new homes, so the terrariums will still have some pretty greenery inside while I try something else.