Thursday, August 23, 2012

Riding on the Carousel of Progress

Ok, so not the actual Carousel of Progress in Disney World. I just wanted to post some progress pictures of the work I've been doing around the Capers, and what can I say, Disney is on my mind. Probably because Chris and I decided to head down a week earlier than we were planning and will get to enjoy an extra five days in the most magical place on earth this year. :-)
 
So back to my progress. I shall share it with you in the form of a joke.
 
Me: Knock knock.
 
You: Who's there?
 
Me: Orange.
 
You: Orange who?
 
Me: Orange you going to say anything nice about my new ceiling?


Ok, so the joke was lame, but that ceiling is hot hot hot. And I'm proud to say I did that all by myself. Remember when it looked like this with half of the sheet rock missing?

 
All you had to do was look up to see wires, a random beam, and an electrical box. It was like our house was going out without any pants on. Or with only half a pair of pants on, I guess ... Anyway, it wasn't pretty.

 
So one day when I was supposed to be working on the basement, I suddenly decided I needed to remedy the ceiling situation immediately. I headed out to the garage and found some pieces of leftover drywall from our bathroom renovation. Then I went to the basement and found that green net-like tape that you use on the joints, as well as a box of drywall screws. After that, it was a quick run to Lowe's for some joint compound and I was ready to go. (And I used to gift card to pay for that, so technically, this project was totally F-R-E-E!)


Since you have to wait 24 hours between applications of the compound before sanding, it ended up taking me a few days to actually get it all smooth and pretty. But then I slapped on a few coats of flat ceiling paint (the flat finish is great for hiding little imperfections, because let's face it, I'm not a drywall pro) and here we are. And yeah, I really slapped it on there ... you can see my splatters running down not one but two spots on the wall in the picture above. Oops! I'll be sure to touch those up soon.

I still need to figure out some sort of trim situation so there aren't the little gaps around the edges. As you can see in the above picture, there's not a lot of space between the ceiling and the windows, so I may have to get a little creative. I'm also going to put a simple base molding down around the floor as well, but that's another trip to Lowe's, which will probably come sometime next week.

And even more exciting, my mom bought me the ceiling-mounted light fixture that I've been drooling over for the last few months as an early Christmas present. So that's due to arrive next week as well. And while I'm no expert electrician, I'm totally willing to risk a few shocks to get that baby installed.

Until then, I'm just thrilled to not feel like I'm getting a peak at my house's underwear every time I come home. hee hee
Pin It

Wednesday, August 15, 2012

Curtains, Paint, and ... Well, More Curtains

Another slow work week means I'm in full swing with working on the house this week. Here's a few pictures to illustrate what I've been up to over the last few days.

First, I bought two full-length curtain panels at Target, which I cut and hemmed to make five panels. The largest was for the door to add a little privacy and still let light filter through. Also, it hides that silly plastic grid that Katie and I weren't able to pry off the window.

Still need to change out that switch cover for a bright white one...

Then I made two small panels for the hallway window.

You can see the paint chips of colors I'm considering painting the bathroom through the doorway.


 Finally, two medium-sized panels for the half bathroom. I actually used a tension rod to hang these since the room is so small. And it helps to mask the fact that the window is still woefully off center.


I took a break from all the sewing and painted the back porch. With the feedback I received from my last post, the winning color is: Woodlawn Colonial Gray!


I love the rich saturation of this grey when compared to the bright green.

Before painting though, I had to caulk as many of the cracks and gaps in the paneling and around the windows as I could. I also wandered through the house, caulking more of the little gaps and things I found in there, although I won't claim to have filled even a quarter of those with two tubes of caulk. Ahh, the fun of living in an old house.

I also scraped random bits of tape off the screen door and thoroughly cleaned the whole thing. So much nicer out there.

Still need to add some trim around the floor to cover up that last gap.

Once I get the ceiling fixed, a new light fixture out there, and some trim around the floor, this tiny room just might be done!

After painting, it was back to sewing, this time for basement curtains. My mom was so sweet and gave me some leftover fabric from a project of hers, and I had just enough to make twelve panels for all six windows. I'm still finishing up, but here's one window completed.

And check out my new poster for the laundry room. How perfect is that? (It was my little reward to myself for all the work I've been doing there. And hopefully it's motivation to finish up, as well. haha)


And I also hung up the fourth of July banner my mom made me just to add a little color down there. How cute, right?


Well, back to sewing curtains. Only a few more panels to go! And then the fun part: picking out a bathroom color. :-)
Pin It

Tuesday, August 14, 2012

Help Me Internet!

Since I've been doing so much work on the trim around the new windows, I decided to hop out onto the back porch and paint the trim out there. And then once that was done and I was touching up the wall paint upstairs, I swiped a few strokes on the walls out on the back porch. In the picture below, you can see two different greys. The top one is Benjamin Moore's Moonshine and the bottom is Valspar's Woodlawn Colonial Gray, which is the color of the dining room walls.


Here's how the colors relate to the new green door and oil rubbed bronze door knob.


So what do you, people of the internet, think about these two colors? Which works better out there? I can't decide and need some opinions! Leave me a comment about your favorite.

Ok, next item of business, I promised to put up some pictures of the new window with the privacy film in the daylight so you could see how much light it lets in. Here's a good example, even though I've done a lot of work on the trim since I took this:


And here's another example with the trim a little more cleaned up. It's getting there!


You can see on the bottom right that I still have to touch up the wall paint, which I'm going to do today. And hopefully the new shower curtain will arrive in a couple days. And then this area of the bathroom will once again be pretty and finished. I do have one area of the bathroom that I still would like to fix up though. I'll give you a hint:


But for today, a few more paint touch ups and sewing curtains are on the agenda and then hopefully one more thorough cleaning of both bathrooms. Ahh, this is the life. lol (What's funny is that wasn't sarcastic.)
Pin It

Saturday, August 11, 2012

Tackling a Big Project ... And Trying Not to Tackle Our Contractor

Does my subject sound a little mean? I promise you'll feel it's totally justified by the end of the post. I had many moments where I just wanted to tuck my head down and just try to knock him over. lol But I restrained myself so that I could complain about him on the interweb instead. So without, further ado, here's the story of our contractor woes.

Recently, Chris and I noticed that a few of the boards in the soffet of our roof line were warped and rotting. We knew it needed to be fixed eventually, but when we kept hearing buzzing in the wall right next to that gap, we decided eventually was now. We definitely didn't want bees burrowing through our walls and insulation.

I figured since we would have to hire a contractor, we might as well knock out a few other projects as well. More specifically, we needed to knock out some windows. Well, I did find a contractor. Only one guy even bothered to come out and give me an estimate. Most of them said they would and blew me off.

So we got stuck with the one guy who was eager to take on our projects: Eddy of Dr. Eddy's Home Improvements. If you live in the area, well, I wouldn't recommend him.

You may remember pictures of our old bathroom window, one of only three original windows left in the house:


You can see that it was not in great shape. The top right corner of the lower window was cracked, paint had managed to get slopped all over the edges of the glass, the window wouldn't even stay open without being propped up, and probably worst of all, you could feel cold air seeping in around the window in the winter. And when the window is in your shower, well, take it from me that bathing was not always a pleasant experience.

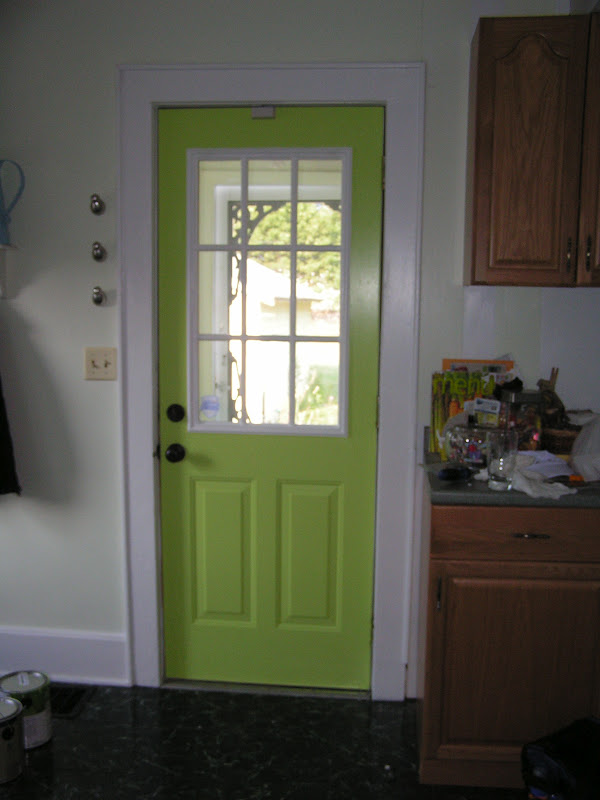
And here's what we had going on in the half bathroom. An off-center window that let in outside air and bugs even when it was closed.


Here's an older picture of the hallway window outside the half bath. It's identical to the one in the half bath. You can see how they opened by tilting inward, so you couldn't really put curtains on them.


So here's the new hallway window. Yes, this is what our contractor called "done." haha It's hard to see the details in this photo to see how bad it is, but basically the window frame is covered in caulk and paint, there are holes in the wall around the trim, the screws were caulked over, but you could still see huge indents, and caulk was just gooped up in random spots. Awesomesauce.


Here's the new half bath window. Same deal, except with this one, he overlapped the trim on the right with the frame, so when the window was closed, you couldn't get your fingers around the push bar to slide it open. We did have him take that piece off and cut it so you could actually open the window. I mean, really? Come on!


Here's a gorgeous example of this guy's sick love affair with caulk, but not really understanding how to use it.


Here's the view from outside midway through the window replacement. At this point I was getting mighty nervous.


You can see the soffet that started it all in the picture above. It was in rough shape. The plywood board is was put up by the contractor, but the white boards underneath were pretty terrible.

As for the downstairs bathroom window, here's a scary halfway done picture:


This picture was after he promised me he wasn't going to remove the trim that was connected to the grout in the tub surround. We just had that natural stone put in a few years ago and I really didn't want it damaged. And that contractor, Tom Hardy, did such an amazing job.

But alas, this time around, we were stuck with Eddy.

Here's Eddy's version of finished. Not too awfully bad from far away.


But get in close and it's a whole different story:

Cracks galore, nail holes showing, trim that doesn't fit back together perfectly ...

Trim that doesn't fit together at all, a whole missing section of trim that Eddy tried to fill in with caulk, caulk all over the cabinet ...

Glopped on paint and caulk, once again all over the new window frames ...

So I'm assuming at this point you understand why I was none too happy with ole Dr. Eddy. And after all this, he had the nerve to charge us $173 over his original quote because he "did do much extra work". Grrrrr.

I guess the best way to look at this is that it was a learning experience. I have learned that cheap isn't always worth it, and that recommendations are absolutely neccessary.

Needless to say, I was eager to get in there and start fixing things as soon as humanly possible. Seeing that mess in my house was giving me a constant stomach ache. Here's all the caulk I pulled off the window frames of the upstairs two windows:


Chris and I were also eager to get some privacy in the bathrooms, so we tackled a little project together soon after Eddy's long-overdue departure. We bought a window frost kit at Lowe's and got to work making the new window a little less friendly to peeping toms ... and not exposing our bums to our neighbors every time we had to use the toilet. lol


The frost film, I'm happy to say, did the job wonderfully. It's clean and smooth and classic looking. It's not super noticeable, and it still lets in lots of light. I took this picture at night, but I'll try to remember to post one of the window with the light shining in.

You'll notice that our shower curtain rod made it back on the trim in the picture above. We bought an extra-long 96" shower curtain so we can put the curtain rod above the window trim, but it hasn't arrived yet, so we went back to our old method until it does.

I also spent a few hours today filling cracks and building up the crappy sections with putty, as well as sanding away rough spots and excess putty once it dried. I have another round of sanding to go, but hopefully then I'll be ready to paint. I'll be so happy to post finished pictures that are actually finished and not just Eddy's version of done.

Here's how everything wrapped up outside, which I have to admit was Eddy's strong suit. Although maybe I just can't get close enough to these areas to see how bad they are. lol

At least you can't see the crappy warped boards now. And hopefully the bees can't get inside ...

There's the two new windows up top, all framed out and painted.


Downstairs bathroom window.
So at least I can end this post on a high note. From the outside, all is well and looks just as good or better than before our whirlwind encounter with Dr. Eddy. And hopefully I'll have pictures of everything looking all smooth and nice and painted soon.

But after a week of dealing with this guy, Chris and I are completely exhausted. I think it's time to kick back, eat some ice cream, and watch the last of the Olympics ...
Pin It

Monday, August 6, 2012

It's SO Easy Being Green

Katie and I decided to tackle a fun little project while she was out visiting this week. I mentioned that I wanted to paint the front and back doors green and before I knew what was happening, Katie had helped me pick out the paint chip and we were at Lowes getting the paint mixed. haha

So here's what our kitchen door looked like before Katie's visit:


And here's what we have to remember Katie's visit by:


Here's the view coming in the back door. Still have a lot of work to do on that area, but isn't that pop of color nice?


We even did the front door to match. Here's the bland entry we used to have to welcome guests:

 Gotta love the brass door knocker and the chain at the top that doesn't do anything.


 And here's the cheery front door now. Yes the siding is still horrible, and the brick steps are broken and pretty pathetic. But look how nice the door looks!


Check out this close-up of the door knocker. I spray painted it with Rustoleum paint in Oil Rubbed Bronze. Pretty great, right? It looks like a brand new piece. I just wish the peep hole and door knocker were centered over each other. lol


Just a little spray paint and it's suddenly a whole new door knocker.
Here's the front door from the inside before the paint.


Check out this disgusting yellow caulk that was around the windows that we had to scrape off.


Umm, can you say gorgeous?


I still need to do a second coat on the front door, as well as some touching up and caulking on the white trim on both doors, but I'd say we pretty much kicked butt on Saturday. Oh yeah, and we definitely went and got ice cream afterward as a reward. :-)